
5 Fun Scientific Art Projects for Kids
|
Getting your Trinity Audio player ready...
|
What is the Benefit of Completing Scientific Art Projects?
Children want to feel happy and interested while they are learning, just like we all do.
That’s why hands-on activities, that involve creating, moving, and problem-solving, are wonderful for keeping kids engaged.
Science and art are two great ways to create hands-on activities!
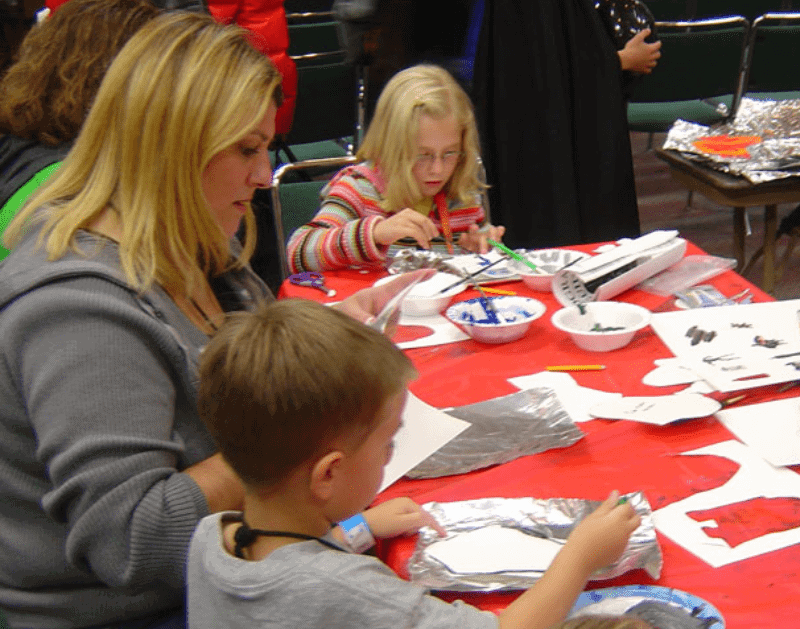
It’s also important to note that interacting with kids in a positive way, through these projects, allows them to build bonds, practice social skills, and learn life lessons.
Enjoy these five scientific art projects!
You may also like to come up with some of your own!
Disclaimer: All of the activities in this article need to be done with adult supervision and all instructions followed as indicated.
If injury occurs in the making of any of these activities, it is not the responsibility of Education and Behavior.
Thank you and have fun!
Scientific Art Project 1:
See How the Sun Makes Chemical Changes and Hang Up Your Work as a Decoration

In addition to providing warmth and light, the sun can also make chemical changes.
Watch these changes take effect with the following materials:
- direct sunlight
- photosensitive paper (can be found on Amazon.com, or at other online stores or art supply stores)
- objects of your choice to make an imprint
- tub/pan of water
- timer/clock
Steps for using photosensitive paper to make art:
1. Take out a sheet of photosensitive paper and lay it flat on a table outside in the sun, blue side up.
2. Find objects that you want to use for your project.
Examples could include jewelry, flowers, toy cars, keys, coins, leaves, rocks, buttons etc. Be careful if it is windy because lighter items could blow away.
3. Quickly arrange the objects on the paper
4. Leave the paper flat on the table for two minutes (time with timer/clock) until the color is pale blue. If the color is not pale blue after two minutes, leave it a little bit longer. Be sure not to leave it for too long.
5. Once the paper is pale blue, take the objects off and dunk the paper in the tub of water to wash the chemicals off. Leave the paper in the water for one minute.
6. Take the paper out of the tub and lay it flat or hang it up to dry.
7. Look at the paper to see the shapes left behind from the objects you had placed on the paper.
The shapes occurred because those objects blocked the sun from making chemical changes to the paper.
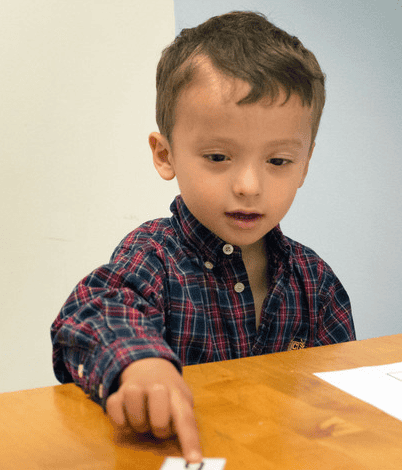
After reading the steps for completing this project below, you may want to use photosensitive paper to teach about letter, number, or shape recognition:
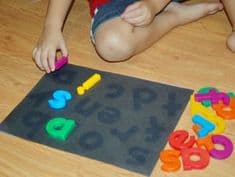
For example, you can put magnetic letters on the photosensitive paper.
When the paper dries, have your child match the real letters to the spaces on the paper, as shown in the example above.
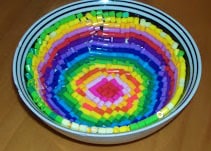
Scientific Art Project 2:
Make a Bead Bowl and See How Heat Causes Plastic to Melt or Change Form

Materials:
- beads: we recommend Perler Beads

- oven-safe bowl such as ones made by Pyrex

Steps to making a bead bowl:
1. Preheat the oven to 350 degrees.
2. Grease the bowl with the oil. A light coating should cover the inside of the bowl.
You can put some oil on a paper towel and rub the inside of the bowl until it has a light greasy film.
3. Arrange the beads in the bowl in a single layer “bowl shape”, picking whichever colors you and your child like.
4. Have an adult place the bowl in the oven for 10-15 minutes. Check on it after 10 minutes and determine if it needs more time.
All beads should appear melted together in the shape of the bowl.
5. Have an adult remove the bowl from the oven using pot holders.
6. Use a butter knife to peel the beads off (bowl should be warm, not hot, when doing this step) and then remove the bead bowl with your hands.
7. Voila! You now have a beautiful bead bowl. It is not recommended to eat food from the bowl.
Try storing fruit, or jewelry, or using it as a candy dish for wrapped candy.
Scientific Art Project 3:
Make a Poster Showing What Trees Look Like in All Four Seasons.
Materials:
- construction paper or poster board
- coloring tools such as crayons/markers/colored pencils/water color paint
- child-safe scissors (optional)
- non-toxic glue/paste/tape (optional)
Steps: This project gives you a lot of room for creativity. You can make the poster in any of the following ways:
1. Pull up pictures on your computer screen from Google Images (do a search for “trees in all four seasons“) Here is an example:
Take turns with your child drawing or painting as a team, to try to recreate the images.

2. Another option is to print out the pictures, cut them out, and paste them to your own piece of construction paper or poster board.
Organize them however you like. You can label them with the season names, pick whatever color paper you want, and color in different details in the background.
3. As a third option, just talk to your child about what trees look like in different seasons (no need to pull up pictures).
Have your child try to color/paint the trees based on how you describe them in different seasons.
They may already know how they look in different seasons and can describe them to you while you try to draw them.
You can also work as a team, discussing the changes and drawing while you talk about them.
However you decide to create this project, it is a great opportunity to talk about how the weather and sun affect the tree-life-cycle.
You can ask your child to share what he/she already knows about the subject and teach him/her new information.
You can also do a Google Web Search to get more information about the tree life cycle so you feel prepared to discuss it with your child or student.
For people who live in warm weather all year, that don’t see these kinds of changes, this project opens up the door to talk about the weather and season changes in other parts of the country or other parts of the world.
This can also be made into a geography lesson (e.g., where on the map do these types of weather changes occur?)
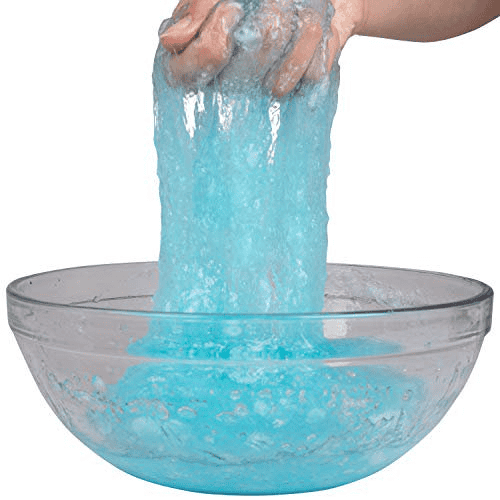
Scientific Art Project 4:
Make Your Own Blue (or any color) Slime
- Borax (a powder found by the laundry detergent in the grocery store)
- mixing bowl
- plastic cup
- measuring cup
- spoon
- food coloring-optional (found at the grocery store in the baking section)
- water
Steps for Making Slime
1. Pour an entire 8 oz. bottle of Elmer’s Glue into a mixing bowl.
2. Fill the empty glue bottle up with warm water, put the lid on, and shake the bottle up.
Pour the gluey water from the bottle into the mixing bowl and use the spoon to mix all the glue and water together really well.
3) To make the slime a color of your choosing, add a drop or two of food coloring.
4) Measure a half cup of warm water and pour it into your plastic cup.
Add a teaspoon of Borax powder and mix. Don’t worry if the Borax powder does not fully dissolve. The Borax is the secret agent that helps turn the Elmer’s Glue into slime, which you will see in the next step.
5) While mixing the glue/water (in your mixing bowl) with a spoon, slowly pour in a little bit of the Borax/water combination. Immediately, you will start to feel the long strands of molecules connecting.
Now, put down the spoon and start using your hands for the serious mixing. While mixing, keep adding your Borax/water solution to your mixing bowl of glue until everything is mixed together.
6) Now you have your slime. Play with it whenever you like. Keep it away from carpets and hair and put it in a zip lock bag or plastic container when you are not playing with it.
Scientific Art Project 5:
Create a Poster that Explains the Water Cycle

Materials:
- construction paper or poster board
- crayons/markers/colored pencils
- cotton (optional)
- watercolor paint
- child-safe scissors (optional)
- non-toxic glue/paste (optional)
This project allows for a lot of creative freedom. You can teach your child about the water cycle while working as a team to create this poster.
This activity also incorporates a reading and spelling lesson because you can label all the parts of the cycle as shown in the picture above.
If you don’t want to draw everything straight on construction paper, you can cut out clouds, water, a sun, and arrows from different colored construction paper, and then paste them on the poster board.
Of course, you would have to draw in the rain or paint the rain drops. For the clouds, feel free to draw them, paint them, cut them out, or glue-on cotton balls.
If you want to make grey clouds, like the one in the picture above, you can use water color paint to make them grey, let them dry, and then glue them on.
Label the parts of the water cycle by either writing them directly on your poster, or writing them on separate pieces of paper and gluing them on.
These are just some suggestions. You may think of more. Feel free to be as creative as possible with your child to make this exciting scientific poster.
Related Articles:
Educationandbehavior.com. Keeping adults on the same page for kids!
Thank you to our sponsors:
- Singing in the Name of…A Karaoke Reality Show and Children’s Charity
- Music by Rachel (a portion of all proceeds go to educational resources for children in financial hardship)
Recommended Tools for Art Projects with Science
Rachel Wise is the author and founder of Education and Behavior. Rachel created Education and Behavior in 2014 for adults to have an easy way to access research-based information to support children in the areas of learning, behavior, and social-emotional development. As a survivor of abuse, neglect, and bullying, Rachel slipped through the cracks of her school and community. Education and Behavior hopes to play a role in preventing that from happening to other children. Rachel is also the author of Building Confidence and Improving Behavior in Children: A Guide for Parents and Teachers.
"Children do best when there is consistency within and across settings (i.e., home, school, community). Education and Behavior allows us to maintain that consistency."
Releated Topics


2 thoughts on “5 Fun Scientific Art Projects for Kids”
Comments are closed.
Rachel,
I love your website! The resources here are unlimited!! Fantastic job!
Thank you so much Rina!!! Thanks for checking it out!